Website Migration Checklist
Table of Contents
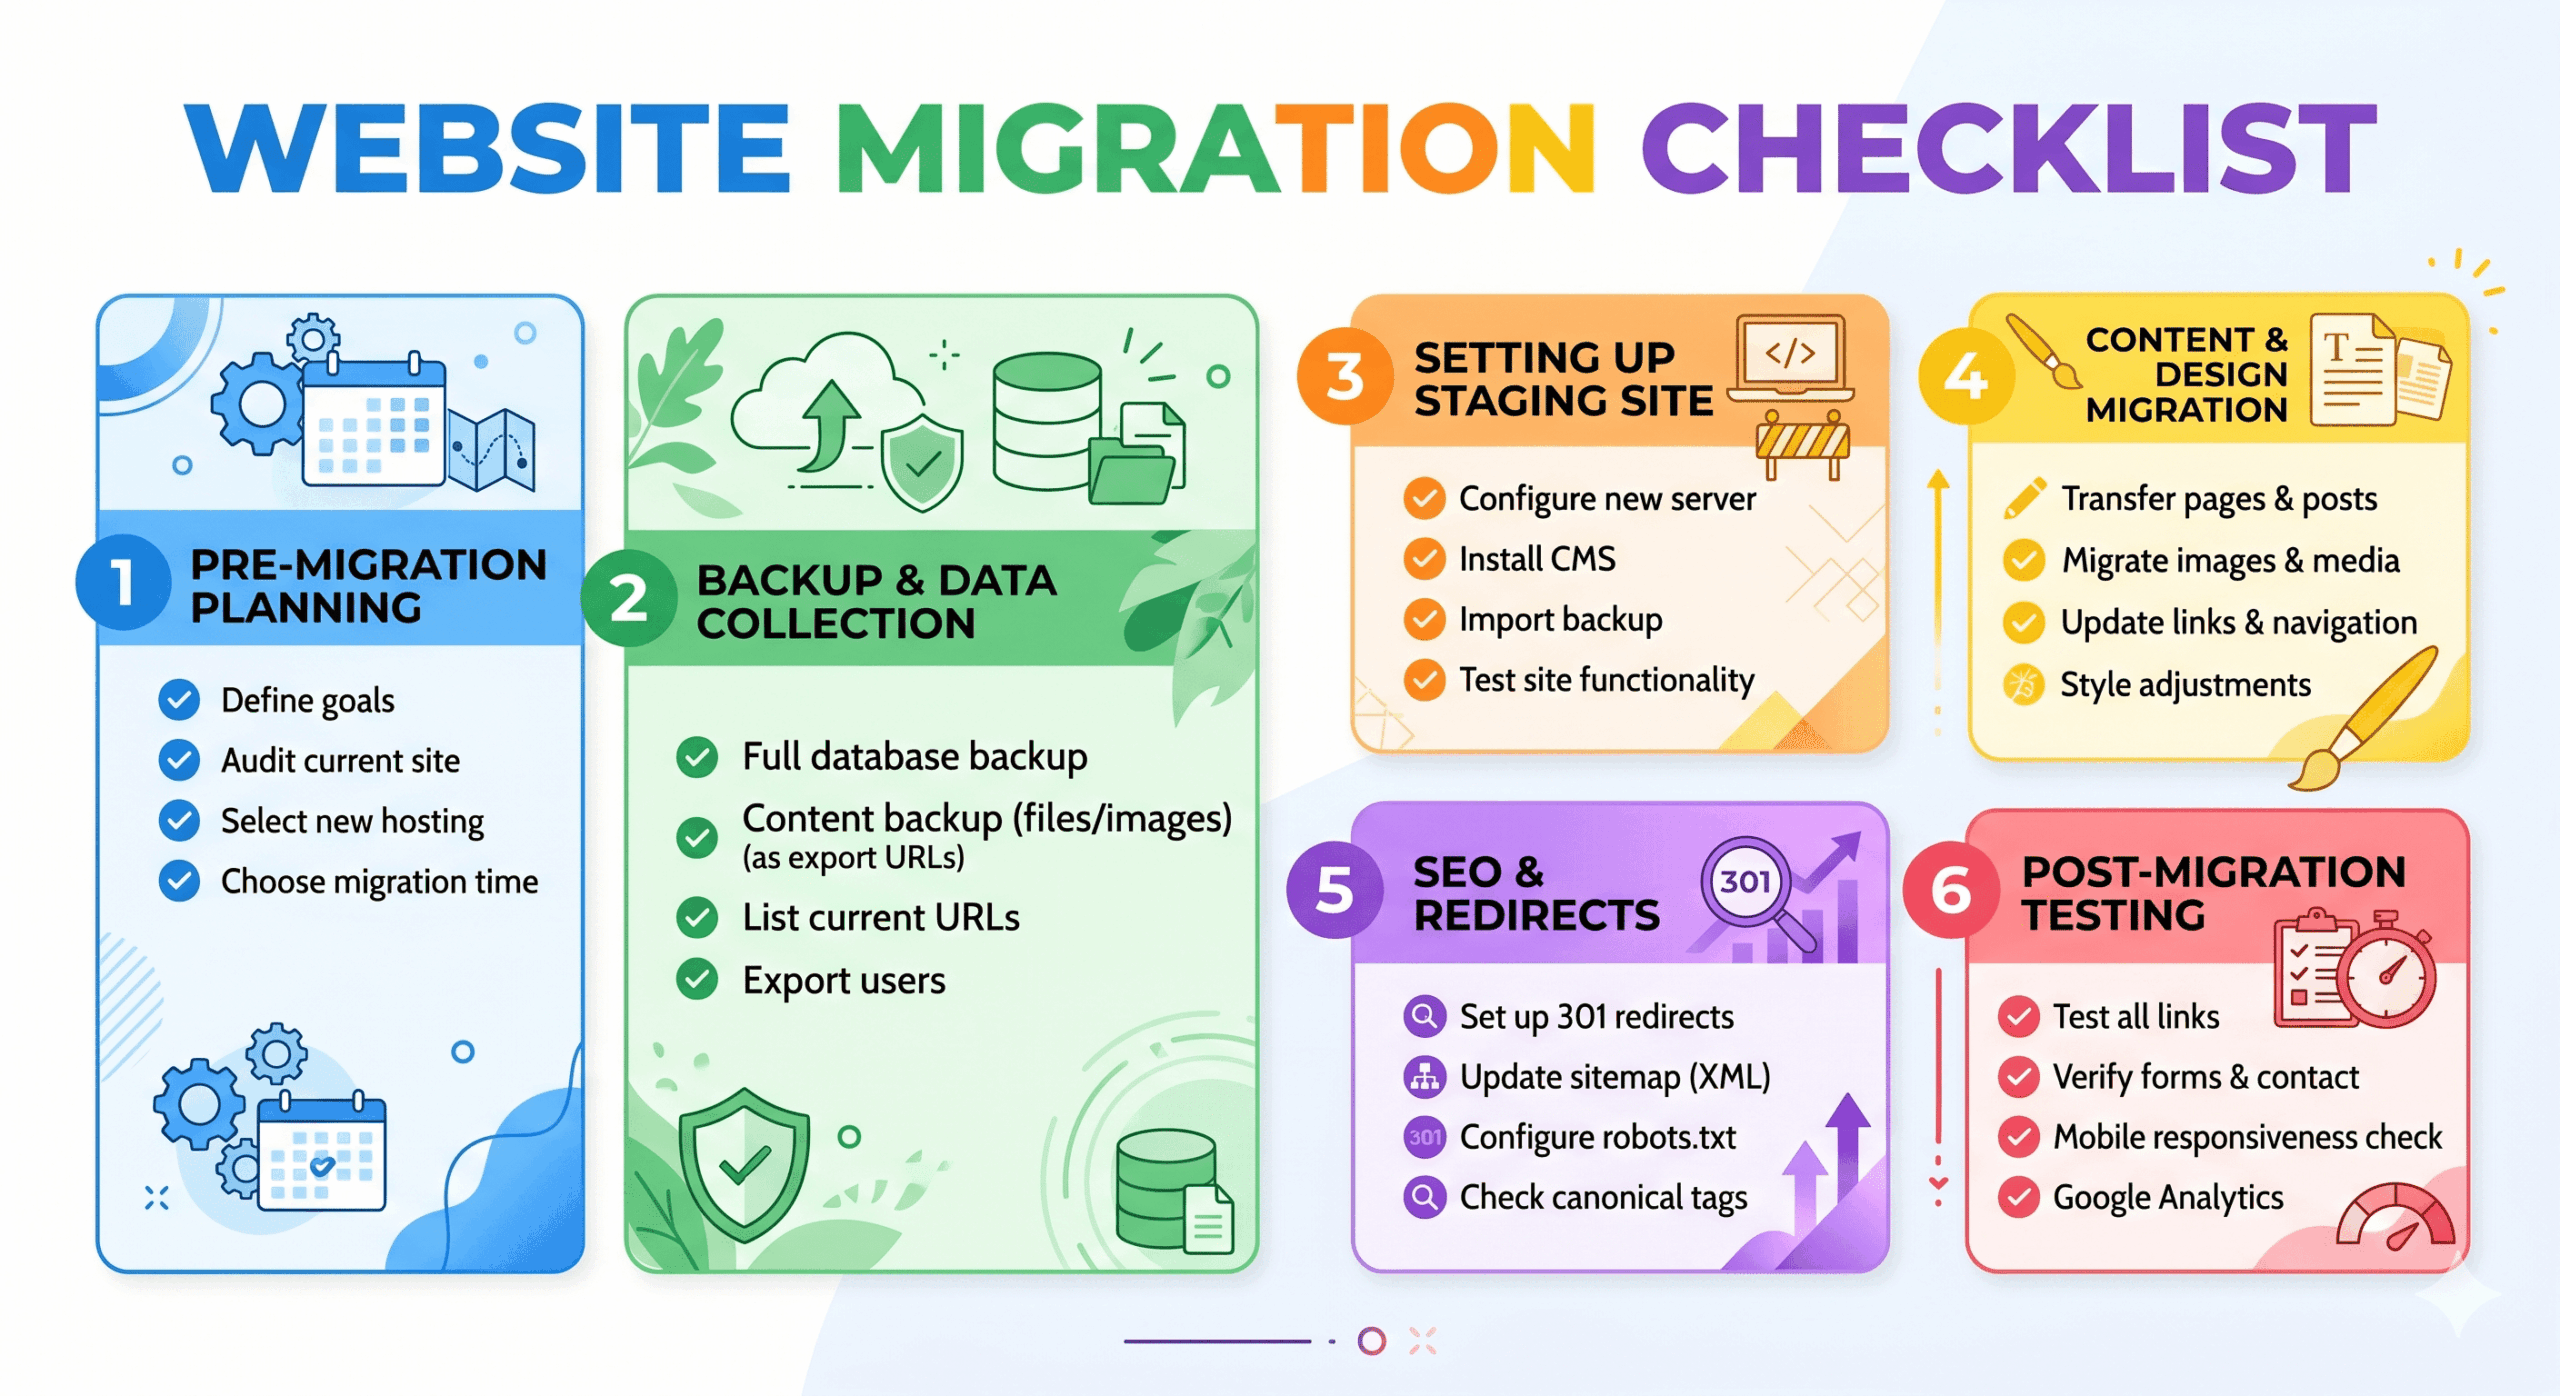
Moving your website to a new domain, switching to a different CMS, or upgrading to an improved site architecture can feel like performing open-heart surgery on your digital presence. One wrong move and your hard-earned SEO rankings could vanish overnight. To prevent a traffic catastrophe, you need a comprehensive website migration checklist that covers every technical and creative detail. This guide is designed for SEO specialists, web developers, and business owners who want to transition their online assets smoothly while preserving authority and user experience.
Preparation Stage
Before you touch a single line of code or change your DNS settings, you must understand the current state of your website. Preparation is about creating a safety net so that if something goes wrong, you can revert back or fix issues quickly.
- ✅ Perform a full site crawl: Use tools like Screaming Frog or Ahrefs to document every URL on your current site.
- ✅ Back up everything: Create a full backup of your database, files, and configuration settings. Store this backup in a secure, off-site location.
- ✅ Establish a staging environment: Never migrate directly to a live server. Set up a private development area where you can test the new site.
- ✅ Identify high-performing pages: Use Google Analytics to find your top-trafficked pages and ensure they receive extra attention during the move.
- ✅ Benchmark current performance: Document your current load speeds, keyword rankings, and organic traffic levels to compare them post-migration.
The Essential Website Migration Checklist for Planning
Success is found in the details of the planning phase. Without a clear roadmap, you risk broken links and “404 Not Found” errors that frustrate users and alert search engine bots that your site is unstable. Use this website migration checklist segment to align your team and define the scope of the project.
- ✅ Create a URL mapping spreadsheet: Map every old URL to its corresponding new URL. This is the foundation for your 301 redirect strategy.
- ✅ Review site architecture: If you are changing the navigation, ensure the new hierarchy is logical and easier for search engines to crawl.
- ✅ Audit your content: Decide which pages will be migrated, which will be merged, and which will be deleted to prune “thin” content.
- ✅ Set a migration date: Schedule the move during a low-traffic period, such as late at night or over a weekend, to minimize user disruption.
- ✅ Notify stakeholders: Inform your marketing team, clients, and partners about the upcoming changes and potential downtime.
Creation and Building Stage
This is where the actual work of building the new site happens. During the creation stage, your focus shifts to ensuring the technical SEO elements are perfectly replicated or improved upon in the new environment.
- ✅ Implement 301 redirects: Based on your URL map, set up permanent redirects. Avoid redirect chains where one URL points to another, which then points to a third.
- ✅ Update internal links: Ensure that all links within your content point to the new URLs rather than relying on redirects.
- ✅ Configure the robots.txt file: Ensure your staging site is blocked from search engines during development, but prepare the live version to allow crawling.
- ✅ Optimize metadata: Carry over your title tags, meta descriptions, and alt text, or use this opportunity to improve them.
- ✅ Check mobile responsiveness: Verify that the new site design is fully functional and aesthetic on all mobile devices and browsers.
The Website Migration Checklist for Post-Launch Success
Once you hit the “publish” button, the clock starts ticking. This phase is critical for ensuring that Google and other search engines recognize your new site quickly and accurately. Following this website migration checklist during the execution phase will help you catch errors before they impact your bottom line.
- ✅ Update DNS settings: Point your domain to the new server IP address. Remember that DNS propagation can take up to 48 hours.
- ✅ Verify Google Search Console: Add and verify the new domain (if applicable) and check for any immediate crawl errors or manual actions.
- ✅ Submit a new XML sitemap: Help search engines discover your new URL structure by submitting an updated sitemap to Search Console and Bing Webmaster Tools.
- ✅ Test all 301 redirects: Use a bulk header checker to ensure that your redirects are firing correctly and leading to the right destinations.
- ✅ Remove “noindex” tags: Ensure that any “noindex” tags used during the staging phase have been removed from your live pages.
- ✅ Finalize your website migration checklist: Double-check that all tracking codes, like Google Analytics and Facebook Pixels, are firing correctly on the live site.
Promotion and Follow-up Stage
Migration doesn’t end when the site goes live. You must actively monitor the health of your site for several weeks to ensure traffic recovers and the new site performs as expected.
- ✅ Monitor the 404 error logs: Watch for unexpected broken links in your server logs and set up redirects for any missing pages you overlooked.
- ✅ Update external links: Reach out to key partners or high-authority sites that link to you and ask them to update their links to your new URLs.
- ✅ Run a post-launch speed test: Ensure your new hosting environment is delivering the fast load times that users and search engines demand.
- ✅ Update social media profiles: Change the links in your bios on LinkedIn, X (Twitter), Facebook, and Instagram to reflect the new site structure.
- ✅ Track ranking fluctuations: It is normal to see a temporary dip in rankings, but monitor your core keywords to ensure they stabilize within a few weeks.
Pro Tips
Experienced developers and SEO experts use these advanced strategies to make a transition even smoother:
- Lower your DNS TTL: A few days before the move, lower your “Time to Live” (TTL) to 300 seconds. This ensures that DNS changes happen almost instantly across the web.
- Keep the old domain: If you have changed domains, keep ownership of the old one for at least two years to maintain the authority of the redirects.
- Test on multiple browsers: Don’t just check Chrome. Use Safari, Firefox, and Edge to ensure the new site rendering is consistent.
- Monitor the indexation status: Check “site:yourdomain.com” in Google daily to see how many of your new pages are being indexed compared to the old ones.
Conclusion
A successful transition requires meticulous attention to detail and a structured approach. By following this website migration checklist, you can mitigate the risks of lost traffic and technical errors, ensuring your new site starts its journey on the right foot. Remember that migration is a marathon, not a sprint—continued monitoring in the weeks following the launch is what separates a good move from a great one.
Are you ready to take the next step in your digital evolution? Start by auditing your current site today and building your redirect map. If you found this guide helpful, share it with your development team to ensure everyone is on the same page for your upcoming launch!